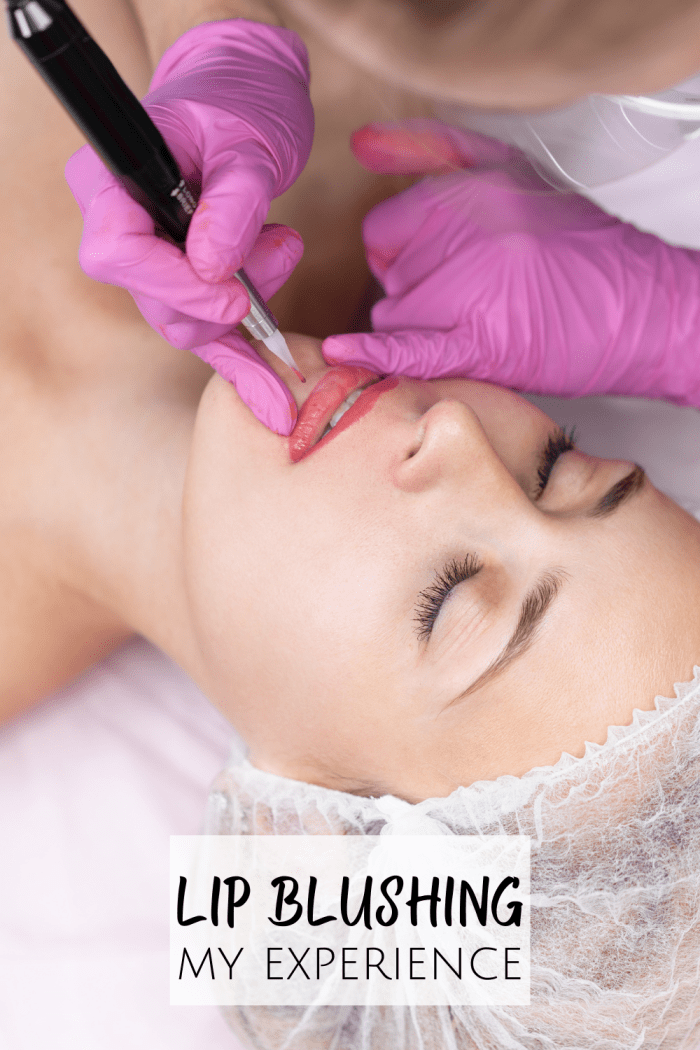
Have you ever heard of lip blushing? Read on and I’ll tell you what it is, why I got it done and what my experience was like…
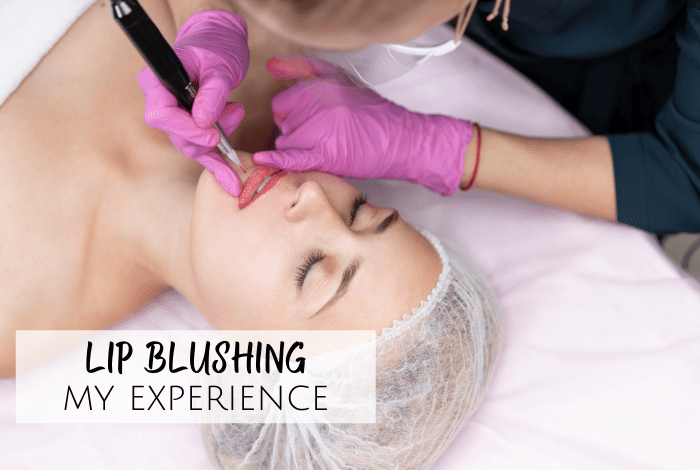
So, let’s start with what lip blushing actually is – it’s a type of semi-permanent cosmetic tattooing procedure achieved by depositing pigments in your lips using small needles. It’s not a solid block of colour being tattooed onto your lips though as the pigments are more to add a bit of a blush of colour to your lips leaving them looking natural, more defined and often giving the impression of fuller lips.
My lips are super pale with no defined outline or shape and my top lip is ridiculously thin so I’ve never really been happy with them. I’ve also never discovered a lipstick that lasts more than 10 minutes on them which has always frustrated me!
When I was getting my nails done a couple of months ago, Anthea, the very lovely lady who does them for me (I have to say that in case she reads this 😂 ) mentioned that she was adding a new treatment to her ever-growing list of treatments. She told me all about what lip blushing was and said she’d just booked onto a training course and would need a couple of models on the day as she had to successfully complete a couple of procedures herself before gaining her qualification.
I couldn’t volunteer quick enough and she was too polite to say no even though I’m sure she’ll have known at the time that I wasn’t really going to test many of her newly learned skills with my lack of adventuress-ness (is that even a word?). Good job I was in the salon when she first booked her course as I’m sure loads of people would have volunteered to be the guinea pig if they’d had the chance!
Anyway, fast forward to today which was the day of the procedure and I’m not going to lie, I was super nervous for a couple of reasons.
Firstly, I have the lowest pain threshold ever! Honestly, a teeny paper cut is a drama for me and almost has me taking myself off to bed with a couple of painkillers to recover so the thought of a needle anywhere near my lips genuinely had me quaking in my M&S sandals.
Secondly, I’m not one for change and didn’t really want anything too different from my current look. I looked online and saw some really dramatic results with some lovely deep colours that looked amazing on other people but definitely not something I wanted. I wanted natural and subtle which I know kind of defeats the purpose of this procedure but my thinking was that my lips were super pale and super thin so some light colour and a bit of definition to them would make a huge difference.

Not the most flattering picture as it’s really zoomed in but you can see what I mean about the shape and colour of my lips!
I turned up at the training salon and filled in the obligatory paperwork before being given the magic numbing gel for my lips which literally started working straight away. I think it’s because your lips are super absorbent so soak up more of the numbing cream than other areas of your body might. I made the rookie error of licking my lips so I had to do the next part with no control over either my lips or my tongue.
The next task was to choose a colour which started with me showing my favourite lipstick so that Anthea and the trainer could see what I wanted and they weren’t thrown at all when I said I wanted that but pinker and more subtle and natural-looking. They started mixing pigments together to get the colour I wanted and after testing about five on my lips, they managed to create the perfect subtle shade that I liked and that they thought matched my skin tone and would give me the end result that I wanted.
So, I had the numb lips and they had the perfect colour which meant that there was nothing else to do but get started. They started by outlining my lips with a lip pencil and paid really close attention to making sure that it was exactly right. I had my eyes shut for some reason but I know it was really carefully done and that there was a ruler involved to make sure it was all even.
Once the outline was perfect, I laid down while Anthea did her thing and got the needle ready to go and then I literally just laid back and shut my eyes hoping that the pain would be over soon. They’d said it would feel a bit nippy as they did the outline and then the inside shading would be a breeze as I wouldn’t feel a thing which had translated into my head as extreme pain and torture for the outline and a lower level of severe pain and torture for the shading.

Unbelievably the pain of the needle when she started was nowhere near what I was expecting and for me with the lowest pain threshold of anyone you’ve ever met, I’d put it at around a four out of ten. Do you know when you get one of those tingly little static electric shocks? Well, that’s the closest way to describe the pain level as she did the outline of my lips.
Also, I should point out that the colour of the pigment is darker than the finished lip blushing result as your lips only retain about 40% of the colour so it needs to be darker so when they wipe the excess off, it’s the colour you actually wanted.
She went around the outline of my lips three times before moving on to the shading of the lips which I’m not exaggerating when I say was a big fat zero on the pain register for the first two times she went over my lips. The third time, I definitely could feel it more but even then it was only a nip and would be around two on my pain register so nothing too bad. They offered some extra numbing cream as I flinched the first time I felt it but I said I didn’t need it which tells you just how it felt.
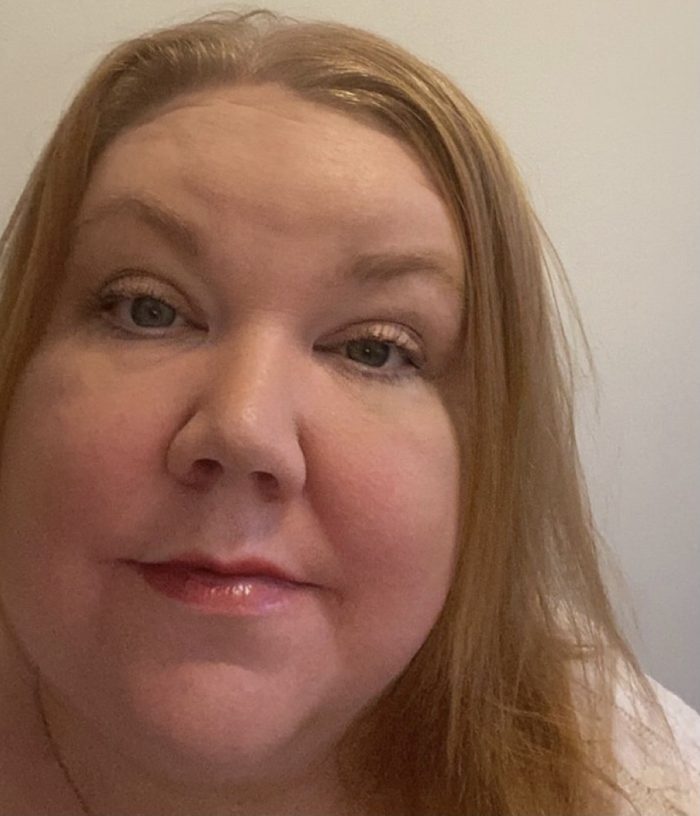
I got to look at the result after the outline and shading had been done three times using the colour we’d mixed up and I could absolutely see the difference with much more definition to the shape of my lips and a lovely tint to them that hadn’t been there before. They’d heard everything I said about looking natural and subtle and did an amazing job but as much as we could tell the difference, it was super subtle at that point so Anthea asked me if she could add an extra layer of colour using a slightly darker pink tint, reassuring me that it would still be subtle and what I wanted but just a little deeper in colour and because I trust her judgement, I said yes and we went in for an extra deeper layer in the shading.
The colour will settle and fade slightly over the next few days and then there’s a top-up session in a few weeks when I think I might even go one shade darker (I know, right – I got brave all of a sudden 😂 ) but right now, I’m super happy with my lip blushing results! I’m even doing something I very rarely do and sharing a photo of myself to show you what they look like right now.
As I’m writing this, I’m about 7 hours after the procedure and there’s no pain although I can feel my lips in a tingly kind of way if that makes sense. They do feel really dry at the moment so I’m using the special cream I was given in a little pot to bring home with me to keep them moisturised.
I’ll keep you up to date on and if anyone lives anywhere near me in the North East and is interested in seeing if Anthea can fit you in then go find her on Instagram and have a chat!
 Also, this isn’t sponsored at all and the free lip blushing treatment was because I was a practice guinea pig who was in the right place at the right time. I had no intention of posting about it on here until about half an hour ago when I opened my laptop and stared at a blank screen for five minutes trying to think of something to write about! 😂
I hope you’ve found my experience of lip blushing useful if you’re considering getting something like this done yourself.
UPDATED 7th November 2022
So, I went back a couple of weeks later for my top-up session and we decided to go wild and go a full shade darker as my initial reservations about the colour being too dark had really made me go in the other direction and whilst both the definition and colour of my lips were already so much better after the first session, we chatted it through and decided to go darker.
It was pretty much the same as the first session but with a darker colour so I won’t bore you too much with the details but afterwards, I was super happy with the decision to go with the darker shade. It’s still nothing too over the top but it’s just a bit darker and much more noticeable and now, a year on, I wanted to update you on how it looks right now!
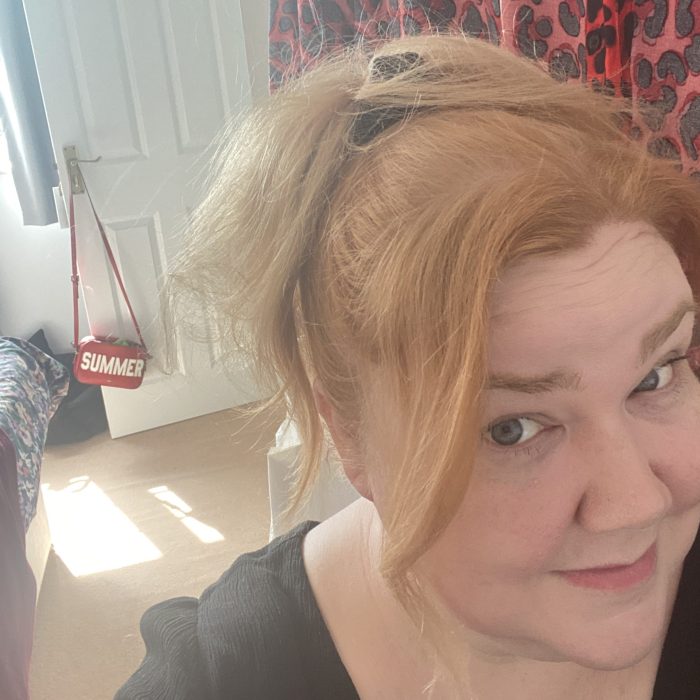
You know I’m not one to share pictures of myself so I don’t have too many to share but this one was taken in September and I have no lipstick on at all. I don’t even have lip gloss on in this picture so this is what my lips look like with no attention 24/7.
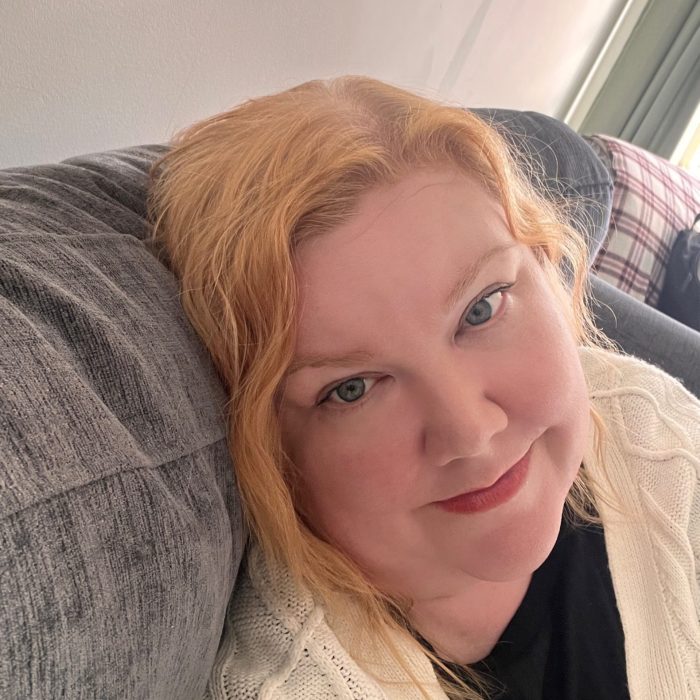
And this one was taken while I was poorly last month, hence the pathetic look on my face. I was sending it to someone in the hope that they would take pity on me and deliver some Pepsi Max and cake to my house. It didn’t work but it does show how they look with some of the rosy lips vaseline looks on them. It gives them even more colour and that’s just a tinted lip balm.
Lip blushing needs a touch-up every 1-3 years apparently and mine is a year in with no signs of fading yet! It’s definitely been a game-changer for me and makes me feel so much more confident about myself. I’ll 100% be getting it done again and I would recommend considering this to anyone – my only advice would be would be to get yourself an Anthea who you trust completely and who you know is not only qualified but is also someone who wants the right results for her clients. Don’t just go for the cheapest price or the earliest appointment – be confident that the person you trust with this is someone who will do a good job!
Don’t miss out on future posts like this – receive updates directly to your inbox by email by adding your email address here and hitting subscribe. You can also follow me on Twitter or BlogLovin and I’d love to see you over on my Facebook page and on Instagram. If you’re interested, you can find out more about me here and while I’ve got your attention, if you’re wondering why some of my posts lately are a little bit less frugal then have a read of this post. 😉
Do your future self a favour – Pin ‘Lip blushing – my experience’ for later:

Discover more from The Diary of a Frugal Family
Subscribe to get the latest posts sent to your email.