Last week I shared how we’d been getting ready for our latest car boot sale, from ruthlessly de-cluttering the house to deciding what to sell elsewhere and spending far too much time sorting costume jewellery into little display trays.
This week, I’m sharing what happens once you actually arrive.
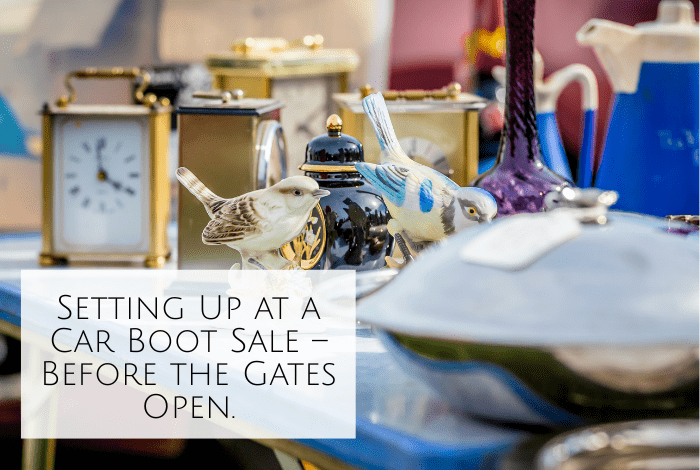
I’m stopping this post before the gates open because that’s where the real selling begins, and I think that deserves a post of its own. Instead, this is all about getting yourself set up with as little stress as possible.
We realised one car just wasn’t going to cut it
With four paste tables, two clothes rails and what felt like half our house packed up to sell, we quickly accepted that squeezing everything into one car wasn’t going to happen.
We ended up taking two cars, which made life so much easier. It meant we weren’t trying to wedge boxes into every available gap and, more importantly, we had enough space to display everything properly rather than leaving half of it in the boot.
Pack in reverse order
One of the best decisions we made was thinking about the order we’d need things rather than just throwing everything into the cars.
The paste tables and clothes rails were the very last things we loaded, which meant they were the very first things we could unload. Within a few minutes we had the tables up, the rails assembled and somewhere to start putting everything else.
If we’d packed them first, we’d have spent ages unloading boxes just to get to them.
Think about your layout before you leave home
One thing that made life much easier was deciding how we wanted to display everything before we even set off.
We had far more clothes than would fit on our two clothes rails, so I spent some time beforehand choosing the better items to hang up. That meant when we arrived, I could simply lift the hangers out of the car and onto the rails without sorting through bags or boxes.
The rest of my clothes were grouped into sturdy boxes by type – dresses together, jumpers together, trousers together and summer clothes together. We planned to sell everything in the boxes for £1 an item, while the clothes on the rails were individually priced a little higher.
Having two pitches definitely gave us the luxury of enough space to do this, but it worked really well. Every time something sold from the clothes rail, I simply picked one of the better items from the relevant box and moved it onto the rail. It kept the rails looking full all day and meant people always had something eye-catching to browse.
We also thought carefully about where we put everything else. The costume jewellery was displayed neatly in the middle of one of the tables, but towards the back rather than right on the edge. It was still easy for people to browse, but it also meant we could keep a close eye on it while we were chatting to customers or helping someone else.
All of the shoes were lined up along the front of the pitch on the ground. Partly because I wanted to make the best use of the table space, but also because I’m ridiculously superstitious and have never liked putting shoes on tables!
Keep your pricing simple
Before we even arrived, we’d already decided that our main aim wasn’t to make as much money as possible from every single item. We wanted to clear the clutter, so we priced things to sell.
Most of the everyday clothes in boxes were £1 each, while the better brands and nicer pieces hanging on the clothes rails were individually priced a little higher.
Books, DVDs, toys and children’s bits were all kept inexpensive too, and our basket of unopened toiletries, makeup and random household finds was mostly 50p or £1. Those little bargains are often the sort of things people pick up while they’re already buying something else.
We didn’t bother putting individual price stickers on absolutely everything. Instead, we grouped similar items together with simple signs showing the price. It made setting up much quicker and meant people could browse without having to ask how much every single thing cost.
We also expected people to haggle a little. That’s part of the fun of a car boot sale, so we priced some things with a little wiggle room. If someone wanted to buy several items together, we’d much rather knock a pound or two off than carry everything home again.
Don’t forget about yourselves
It’s very easy to think about what you’re selling and completely forget that you’re probably going to be there for several hours.
We packed a couple of camping chairs so we had somewhere comfortable to sit once everything was ready, along with plenty of drinks and snacks. There was a burger van on site, but we’d rather spend our profits on something more exciting than lunch, so taking our own food seemed like the sensible option.
Know the entry times before you set off
The car boot sale we visited has different seller prices depending on what time you arrive so for an extra £5 you can get in early and be there for the earlybird buyers but we decided against that.
We opted for the standard seller entry, which gave us plenty of time to get organised before the buyers came in without paying the highest early bird fee. Buyers also pay more if they want to get in early, so it’s worth checking the times and prices before you leave home as every organiser runs things slightly differently.
Don’t rush to unpack
This was probably the best piece of advice we’d been given before we went.
When you first arrive, it can be tempting to jump straight out and start unloading. We didn’t.
Instead, we stayed in the car for about ten minutes while everyone was arriving and getting parked. There are always other sellers walking around before the gates open, and some of them are looking for bargains they can buy and resell later.
I don’t have any problem with that at all. If someone spots something they know they can make money on, fair enough.
What I didn’t particularly want was people leaning into the boot and asking to buy things while we were still trying to unload and organise ourselves.
Waiting a few minutes meant we could start setting up without feeling rushed or distracted.
Build your stall before opening the boxes
The very first things we unpacked were the paste tables and the clothes rails.
Once those were in place, everything else had somewhere to go. Boxes could be unpacked straight onto the tables instead of ending up scattered all over the floor, and the clothes could go straight onto hangers rather than being piled up in bags.
Because we’d already decided where everything was going before we left home, setting up was much quicker than it could have been. We weren’t constantly moving things around or wondering where they should go – everything had its place from the start.
By the time the gates were about to open, we were sitting in our camping chairs with a coffee in hand, feeling surprisingly relaxed and ready for the day ahead.
So far, everything had gone exactly to plan.
Next week I’ll share what happened once the buyers arrived, whether our carefully planned layout actually worked, what sold first, how much haggling there was and, of course, whether all that preparation paid off.
I’d love you to follow me on Twitter and it would be amazing to see you over on my Facebook page and on Instagram. If you’re interested, you can find out more about me here and while I’ve got your attention, if you’re wondering why some of my posts lately are a little bit less frugal then have a read of this post. 😉
Do your future self a favour – Pin this post for later.

Discover more from The Diary of a Frugal Family
Subscribe to get the latest posts sent to your email.