
I think we’ve established over the years here that I am NOT a natural crafter, and no matter how much effort I put into something, the finished result very rarely ends up looking like the version I imagined in my head before I started.
That’s generally why I stay away from crafts that are going to be on display for people to see when they come to my house. And then, a couple of weeks ago, I was out shopping, admiring all the pretty fabrics and imagining the questionable masterpieces I could create with them, when a lovely shop assistant brought out a stack of wire wreath rings… and suddenly my mind went into overdrive.
I remembered seeing an article in a magazine where some very clever, crafty person made it look ridiculously easy to make a beautiful rag wreath using one of these rings and a pile of fabric scraps. I tried to talk myself out of it, but I still walked away with three rings from Joann’s (go big or go home, right?) and some of the fabric I’d fallen in love with.
Then I got home and couldn’t find the article anywhere, so I ended up having to wing it. That meant the beautiful rag wreath I’d pictured proudly hanging on my hall wall was probably destined for disaster before I’d even started.
Here’s how I got on….
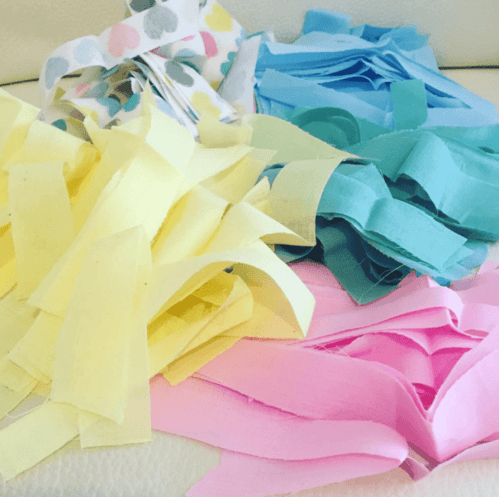
I started by cutting my fabric into strips about six inches long and around an inch wide. They don’t need to be perfectly neat, and you don’t need to use as many colours as I did. The only thing I’d say is that the fabric I chose was quite thin and frayed easily. It wasn’t a big issue, but if I made it again I’d pick a thicker fabric to make life easier.

I used four colours for my homemade rag wreath, and to make sure they were evenly spread out, I sorted them into piles and got myself into a little rhythm — I just kept repeating “pink, blue, yellow, green, multi” as I worked. 😉
All you need to do, once you’ve got your strips ready, is knot each one onto the wreath ring. Just like this one:

Once you’ve knotted the first strip onto the wire ring, you just keep adding the next one, pushing them as close together as you can before tying on the next strip.

When there’s no space left to add any more fabric, you can give the whole wreath a good fluff up and gently push the fabric towards the front so it looks nice and full. I finished mine with a simple piece of cream ribbon tied at the top as a hanger, but you could use a longer fabric strip instead if you prefer.
The finished wreath is surprisingly effective, even using slightly frayed fabric — and even with my very limited craft skills.

I genuinely love how it turned out and, for once, it looks (almost) exactly how I pictured it in my head. It’s hanging in my hall now, and I’ve had so many lovely compliments that I think we can safely call this homemade rag wreath a success!

I’m already planning a red and green version for Christmas, with a few little touches of gold ribbon added in here and there.
A homemade rag wreath is such a great craft for the un-crafty (like me!) and it makes a really thoughtful, budget-friendly gift. You can match it to any colour scheme, or even use old clothes — maybe pieces of the kids’ outgrown clothes you want to keep in a special way.
I bought my wire wreath ring from Hobbycraft for a pound, but if you don’t have a Hobbycraft nearby, there are plenty available on Amazon too.
If you think you’ve seen this post before, you absolutely might have. This week’s posts are a little bit special because my very lovely daughter, Miss Frugal, has stepped in to help while I’m feeling a bit under the weather. She’s chosen some of her favourite old posts to share with you again – the ones that bring back happy memories of things we’ve made, done or visited together, and I honestly can’t wait to see what she’s picked. One of the conditions of her takeover was that she was allowed to do it all herself, so I’ve written this little intro for her to add to each post she chooses. I’ll be finding out what she’s re-sharing at the same time as you do. The control freak in me is very uncomfortable with this. 🫢
I’d love you follow me on Twitter and it would be amazing to see you over on my Facebook page and on Instagram. If you’re interested, you can find out more about me here and while I’ve got your attention, if you’re wondering why some of my posts lately are a little bit less frugal then have a read of this post. 😉


Discover more from The Diary of a Frugal Family
Subscribe to get the latest posts sent to your email.








This is so cute!! You could make them for all different seasons, holidays and events! Brilliant.
What a fabulous idea – might make an orange and black one for halloween
What a easy and fun craft to do, festive colours would look great.
I'm terrible at crafts but these look very simple and effective.
It look really pretty, I could see it hanging in my girls bedroom. I love the idea of a Christmas one with Christmassy colours.
Great idea! Looks fabulous too. I can definitely see a Christmas rag wreath coming. I need to get myself down to hobbycraft
Fab idea – love those wore wreaths and a good price too. Thanks for the link.
Going to have to try and create something similar your rag wreath looks fab x
What a beautiful idea and i love the finished result. This would be perfect at Christmas or Easter xx
Wow, so simple but really cute Cass. Mich x
this looks really pretty – I might even give a red and green one a go for Christmas! x
ooh this looks really fun and is something my daughter would probably enjoy making with mummy.
Red green and silver would be fab for Christmas! x
What a loely idea. A red and green Christmas one would be fab too – I might try a silver and gold one!
I saw this on Instagram and loved it. It is perfect and I can see a Christmas one coming my way!
What a beautiful idea! I'm thinking this could be adapted for Christmas too and decorated with festive colours. Or even an autumnal one…one for each of the season! Thanks for the inspiration!