I hate when those little bobbles appear on my favourite clothes and up until now, I’ve never found a foolproof way to get rid of them. I have now though so today, I’m going to tell you how you can remove bobbles from your clothes and make them look as good as new again!
First up, what actually causes those pesky little bobbles?
Bobbling happens when the fibres on the surface of your clothes rub together, creating tiny little balls of fluff. It’s the friction that does it — which is why the underarm area and the sides of jumpers and tops tend to suffer the most. Those parts rub together constantly, so they naturally pill quicker.
You’ll usually notice bobbling more after a wash because the movement in the machine pulls loose fibres together and turns them into the little clusters you see on the surface.
And if you’re interested, the technical term for these tiny nuisances is “pilling”. 😂
So… how do you remove them?
You’ll see disposable razors suggested everywhere, and although they can work on tiny patches, I’ve never had much success. They blunt quickly, clog quickly and before long you need a new razor. I’m also not a fan of using single-use products for something like this.
Lint rollers and even a bit of sellotape can lift very light bobbling, but for anything more than that, nothing has ever worked as well for me as my fabric shaver.
I bought my fabric shaver from Amazon after reading through a mountain of good reviews. It had almost 2,000 reviews and a 4.5-star rating, so I was confident it would at least do something.
What I wasn’t expecting was how well it would actually work.
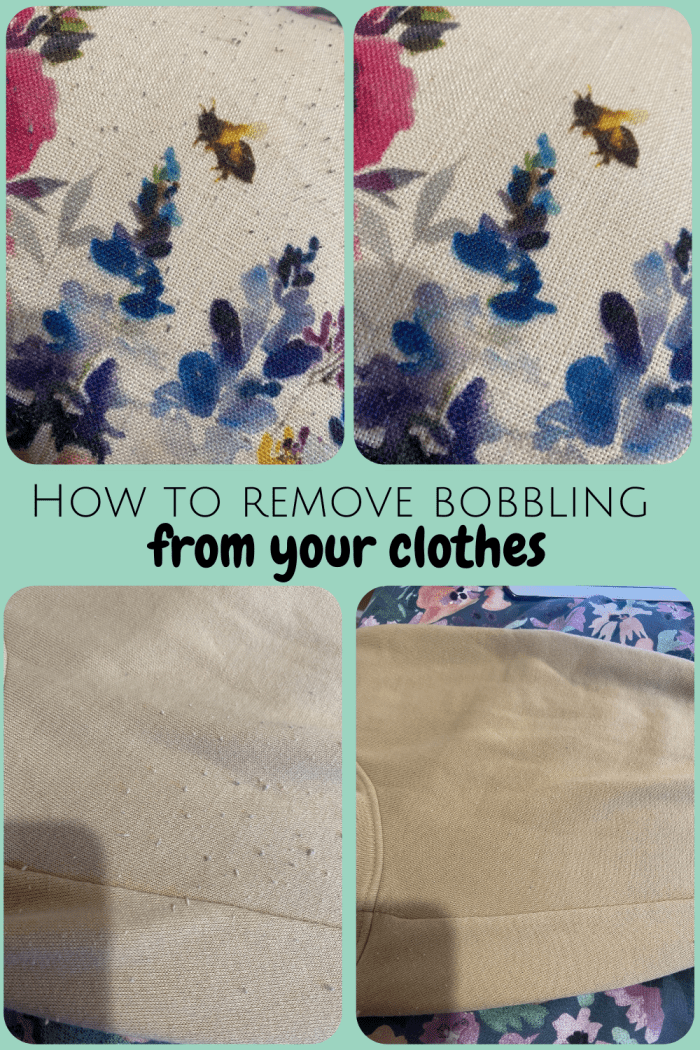
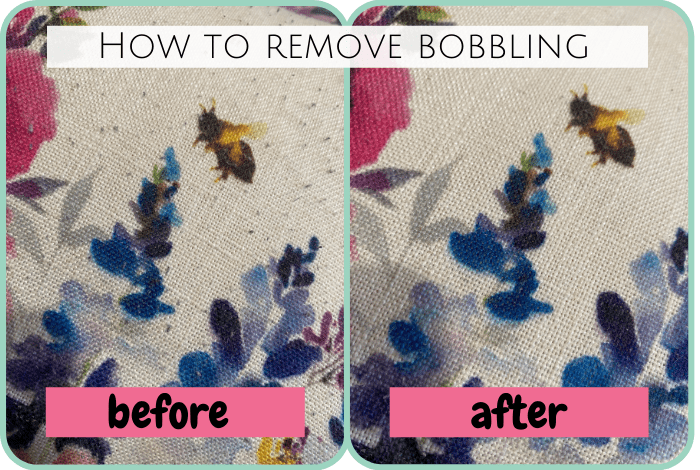
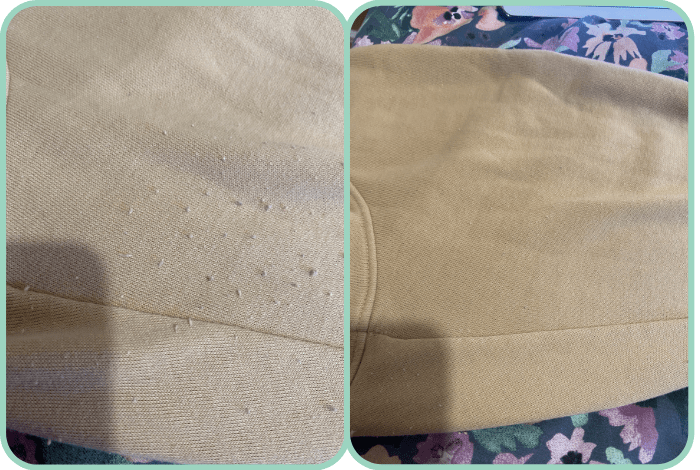
The first thing I tried it on was my favourite (and relatively new!) jumper from M&S, which had pretty noticeable bobbling around the underarms and chest. Honestly, I was shocked at how quickly it made a difference. It looked almost new again.
Forgive the lighting here – I promise it’s the same jumper. 😁
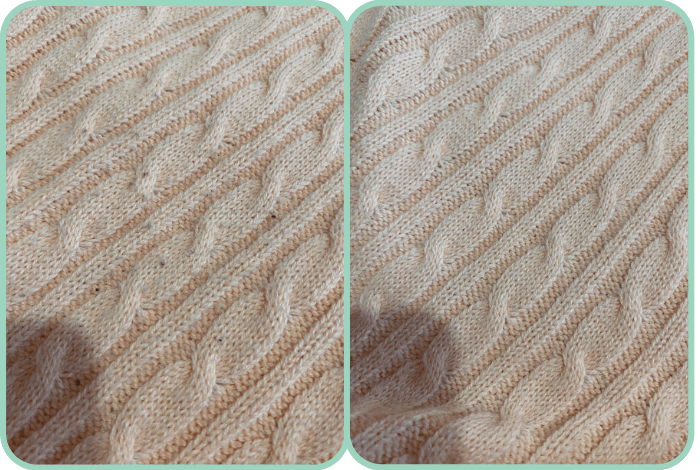
Next I tried it on a knitted jumper, which wasn’t too bad but had started showing early signs of pilling — again, it worked brilliantly.
But the real test was a cushion I bought a while ago that had bobbled so badly I was close to giving up and binning it. It wasn’t expensive, but it looked awful. A couple of minutes with the fabric shaver and it looked like I’d replaced it. The before-and-after photos of that cushion genuinely show just how effective this little gadget is.
Just look at the difference it makes. It’s such a satisfying result. 😊

It’s amazing and for the price I paid for it, it’s actually been a great investment already and I believe it’s already paid for itself with the clothes that it’s saved so far even in its short time with me,
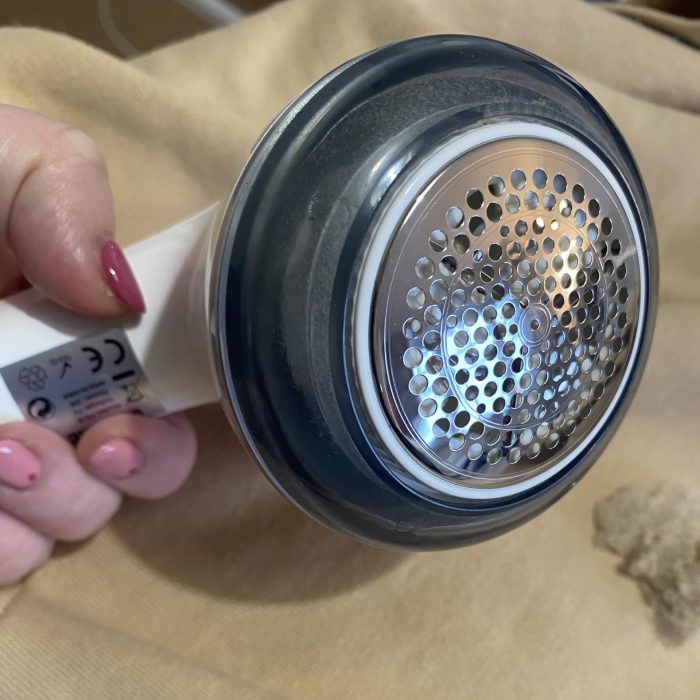
This is the one that I bought, it cost £11.89 and was worth every penny!
Don’t miss out on future posts like this – receive updates directly to your inbox by email by adding your email address here and hitting subscribe. You can also follow me on Twitter or BlogLovin and I’d love to see you over on my Facebook page and on Instagram. If you’re interested, you can find out more about me here and while I’ve got your attention, if you’re wondering why some of my posts lately are a little bit less frugal then have a read of this post. 😉
Do your future self a favour – Pin ‘How to remove bobbles from your clothes’ for later: