There’s nothing I love more on a cold night than closing the curtains, getting cosy and lighting a few candles around the house.
The last few candles I’ve bought haven’t really had much of a scent though, which is always a bit disappointing when that’s half the reason I buy them in the first place, so I decided I’d have a go at making my own.
I’ve made teacup candles before and really enjoyed it, but this time I wanted to do something a bit different. Rather than buying proper candle jars, I did a little trawl of the charity shops in my village looking for random things that I thought would make good candle containers.
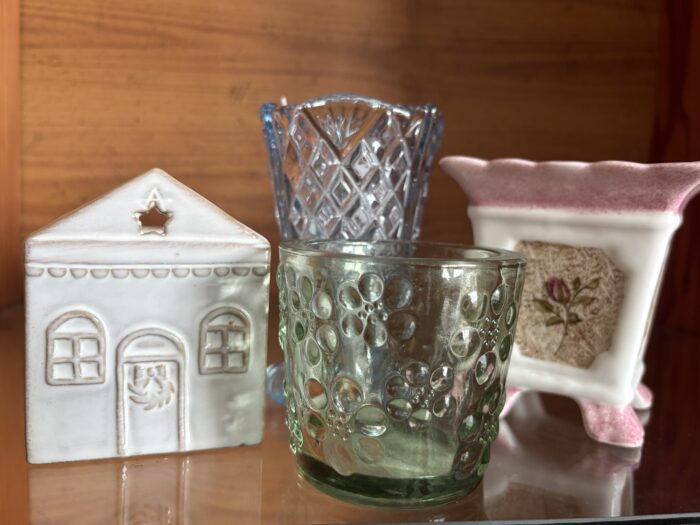
I found a few really lovely bits, including a little ceramic house, some patterned glass pieces and a pink and cream ceramic one that I absolutely love. None of them cost more than £1.50, which made it a really cheap little project to have a play around with and, if I’m honest, hunting for the containers was probably one of my favourite parts.
You can actually use old candle containers too. I’ve written a post in the past about how to clean out your candle jars which I’d recommend having a look at before you start if you’re going to do that. 😂
Once I’d found my containers, I bought some soy wax flakes, wicks and scented oils. I’m going to link to the wax I bought from Amazon because it was exactly what I needed and, more importantly, it saved me from spending forever trying to work out which one to buy from all the different options.
For the fragrance oils, I found a site that sells little tester sizes for between £1 and £1.50 each, which was perfect because I wanted to try a few different scents without spending a fortune on full-size bottles and then discovering I didn’t actually like them. I picked a few different ones to experiment with and it meant I could have a bit of fun with the scents without the cost creeping up too much.
The easiest way I found on Google to work out how much wax I needed was to fill each container with water, measure how many ml it held and then multiply that number by 0.86 to get roughly how many grams of wax I’d need.
So, for example, if a container holds 200ml of water:
200 x 0.86 = 172g of wax.
That gave me a really easy starting point and, in theory, should have stopped me from melting far too much wax for each one.
Except I then went rogue and completely freestyled it. 😂
I basically just guessed how much wax I thought I’d need and melted that instead, which actually worked out pretty well. Not exactly scientific, but close enough for me.
Next up was melting the wax. The proper way to do this would be to gently melt it in a heatproof jug over a pan of simmering water, keeping an eye on it and stirring as it melted.
I, however, microwaved mine in a microwave-safe jug in 30-second bursts, stirring in between. 😁
Once it was fully melted, I added the fragrance oil. My little jars took between 55ml and 75ml of melted wax, so I just went with around 5ml of fragrance oil in each one. That seems to have worked really well because the scent is strong enough without being overpowering, which is exactly what I wanted after being disappointed by the candles I’d been buying.
Then I fixed the wick into the centre of each container with a teeny bit of melted wax and thought I’d cracked it because it held the wick nicely in place.
Turns out this wasn’t my best plan.
As soon as I poured the rest of the hot wax in, the little blob of wax holding the wick melted again and the wicks started going all over the place. 😂
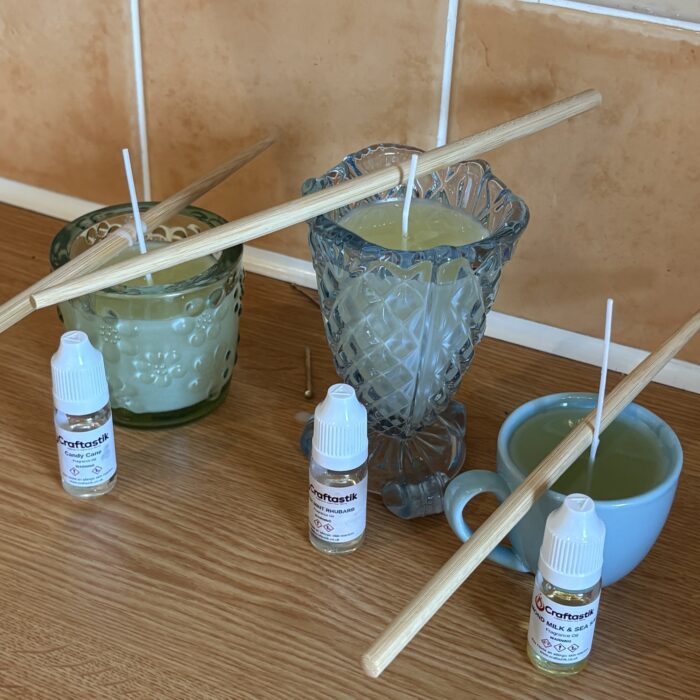
I ended up balancing chopsticks across the tops of the containers to keep them straight while they set, which worked much better and is definitely what I’d do from the start next time.
Once they were completely set, I trimmed the wicks down to around 5mm and then came the hardest bit — leaving them alone.
Soy candles are better if you give them time to cure before lighting them, so ideally I’d leave them for at least a week and preferably closer to two weeks so the fragrance has time to settle properly into the wax.
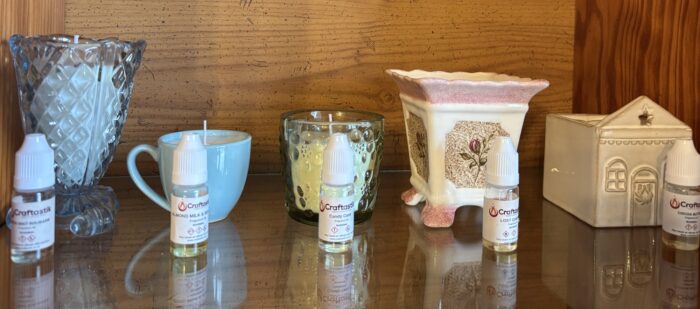
The main thing I’d say if you’re using charity shop finds as candle containers is to be sensible about what you use. I only picked things that felt sturdy and heat resistant, with no cracks or damage, because they obviously need to cope with the heat from the candle.
And as with any candle, I’d never leave one burning unattended.
I love how different they all look and I think that’s what I like most about making them this way. They’re all completely random and none of them match, but that’s kind of the point.
And the best bit is that they smell amazing. I’m so pleased with how they’ve turned out that I’m already planning a Christmas batch with some more festive scents.
If you don’t want to miss future posts, you can add your email address to the subscribe box on this page and new posts will land straight in your inbox. You can also follow along over on my Facebook page or on Pinterest for more money-saving ideas, recipes, family life and everything else I share on Frugal Family.
And if you’re looking for some extra meal planning inspiration, you’ll find me over on my other blog, Meal Planning Made Easy, where I share simple meal plans, family-friendly recipes and plenty of ideas to make feeding everyone that little bit easier.
Do your future self a favour – Pin this post for later.

Discover more from The Diary of a Frugal Family
Subscribe to get the latest posts sent to your email.






Talk to me...