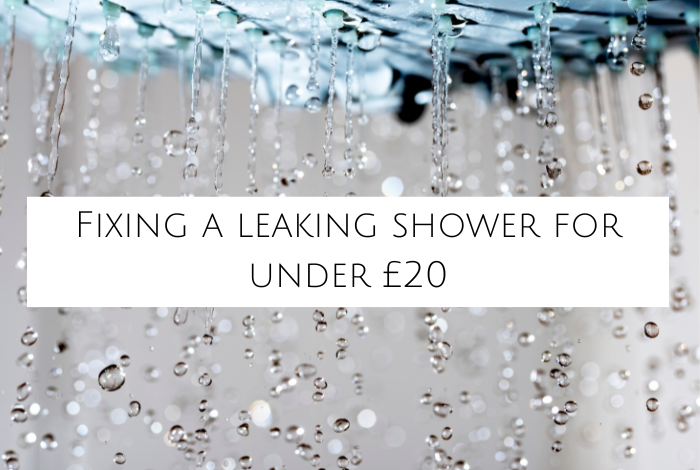
**I used to panic when something went wrong in the house as my first thought was ‘how much is this going to cost?’ but I’m learning that there are so many jobs that you can do yourself at a fraction of the cost and I want to start sharing a few of those with you!**
When we moved into Sherbet House, I naively thought the bathrooms would be one of the “easy” parts. You know… a quick clean and a quick refresh of the rooms but the house gods were not smiling down on us. 😂
Both bathrooms had carpet in them. Carpet. In a bathroom. I still don’t understand the logic. And just to really commit to the theme, there was wallpaper too… which, again, isn’t exactly ideal in a room that gets steamed up twice a day. And don’t even get me started on the wallpaper choice in the ensuite…
So pretty early on, we ended up redoing things properly. We fitted a new shower, pulled everything back to something a bit more practical, and (thankfully) said goodbye to the bathroom carpet forever. When I say we, I do of course mean my partner did all the work while I supervised and made helpful comments from the sidelines although there may be some disagreement about the level of helpfulness in my comments. 😀
Even after all of that, though, our ensuite started doing that annoying thing where the floor was always just a bit… damp. Not flooded, not dramatic, just enough to make you question it every time you stepped out of the shower. If you’ve ever stood on a slightly wet bathroom floor in your socks, you’ll know exactly the feeling.
My first thought was honestly “here we go… this is going to cost a fortune.” Because that’s what you’re always told, isn’t it? That anything shower-related means plumbers, parts you can’t get anymore, and somehow a £500 bill. But this time, it turned out to be something much simpler.
The bit no one really talks about
In our case, and in a lot of cases, the problem wasn’t the shower itself at all. It was the seal.
That thin strip along the bottom (or side) of the glass door that you don’t really notice… until it stops doing its job. Ours had gone a bit tired and brittle, and once water starts escaping there, it doesn’t take much before your bathroom starts feeling permanently damp.
The thing I didn’t realise is that these seals are basically the whole reason your shower works properly in the first place. They’re what keep the water where it’s meant to be, without you having to think about it.
Why replacing it isn’t as simple as grabbing any old one
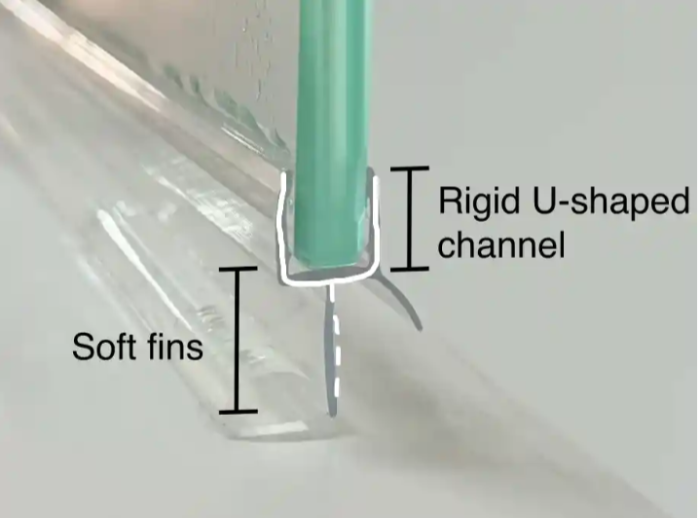
I did briefly think I could just pick one up anywhere and shove it on, but it turns out there’s a bit more to it. You’ve got the part that grips onto the glass (the rigid U channel) , and then the flexible bit (the flexible fin) that actually blocks the water, and that flexible part needs to be the right length. Too long and the door drags or won’t shut properly, too short and… well, you’re back to wet socks.
If you’ve got sliding doors (which we do in one of the bathrooms), it gets even more specific because the seal can’t interfere with the track. This is where I stopped guessing and actually looked for something that matched properly.
I’d seen SIMBA Seals mentioned a few times when I was googling around, and what I liked was that they actually have loads of different options depending on your setup. Not just “one size fits all” which, let’s be honest, rarely does.
What we actually did (and it was surprisingly easy)
I’m not massively DIY-heavy, but this was very doable (for him… I provided the moral support whilst watching TikTok from the sidelines). He took the old seal off, which just pulled away without any fuss, then gave the glass edge a really good clean using vinegar and a cloth to get rid of limescale and grime. After that it was just a case of measuring the thickness of the glass and the gap we needed to cover, then clipping the new seal into place.
That was it. No tools, no stress, and definitely no plumber.
The difference it made
The difference was immediate. No more water escaping, no more damp patches, and the door actually felt better to open and close too. It’s one of those small jobs that makes the whole bathroom feel sorted again, and considering it cost under £20, it’s probably one of the best-value fixes we’ve done since moving in.
Worth checking before you panic
If your shower is leaking, it’s really easy to jump straight to worst-case scenario. But before you do, it’s worth having a quick look at the seal. If it’s looking worn, stiff, or not sitting properly anymore, there’s a good chance that’s your issue.
It’s such a small thing, but it does a big job. And honestly, anything that avoids calling someone out (and paying for it) gets a win from me 😀
I’d love you follow me on Twitter and it would be amazing to see you over on my Facebook page and on Instagram. If you’re interested, you can find out more about me here and while I’ve got your attention, if you’re wondering why some of my posts lately are a little bit less frugal then have a read of this post. 😉
Do your future self a favour – Pin this post for later.


Talk to me...