I first blogged about melted crayon cakes way back in 2011, but last weekend I made a Christmassy version that I thought you might like to see today. It’s such a simple little craft, but it looks so cute and it’s a lovely way to spend a cosy afternoon together.

When I first made my colourful crayons, it really was back in 2011 when the kids were still at the stage where colouring and drawing filled entire afternoons. The idea back then was to melt together all the random stubby crayon ends that collected at the bottom of their drawing boxes, and it worked perfectly as a fun way to use them up.
This time around, I made them as a little activity while I was looking after my favourite four-year-old, so I actually bought the crayons rather than using scraps. Not quite as frugal, I know, but they were only about a pound and absolutely worth it for the fun we had making them — and the excitement of trying them out afterwards.
I used to make these melted crayon cakes in small individual silicone moulds that I picked up from the pound shop, but I threw those out a while ago as I only ever used them for this one thing. This time I used a random silicone mould I’ve somehow collected over the years — the same one I’ve used recently for everything from homemade bath melts to homemade gummy bears over recent weeks!
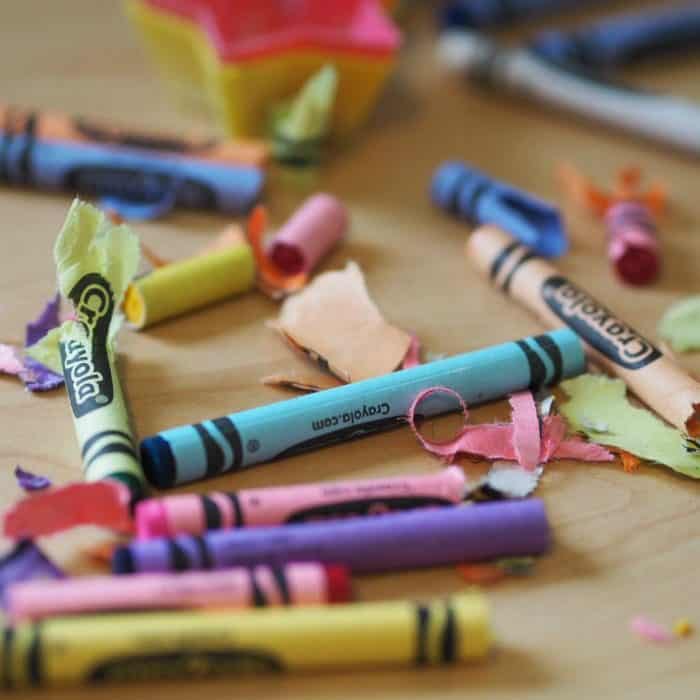
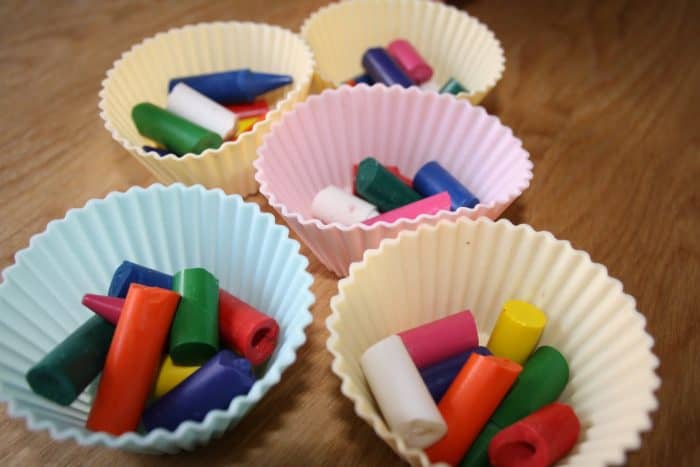
These melted crayon cakes are so easy to make: just break the crayons into small pieces and divide them evenly between the moulds you’re using. I don’t have a photo of us doing this with the star moulds because, as you can imagine, that’s easier said than done with a very enthusiastic four-year-old ‘helping’. So here’s an old photo from the last time I made them, which actually works well because you can see the moulds I used to use.
Once the colours are evenly spread out, pop the silicone moulds onto a baking tray and place them in the oven at around 160°C. They usually take about 15 minutes, but the timing depends on the size of your crayon pieces. We used smaller star moulds this time, so they melted a lot quicker than the bigger ones we’ve made in the past.
You’ll want to keep a close eye on them so you catch the moment they’ve melted together but before the colours all mix into one. I start checking every minute or so from about the ten-minute mark just to make sure I get that perfect marbled look, and then take them straight out.
Just leave them to cool and set completely, and once they’ve hardened, you can pop them out of the moulds. They look so sweet, they colour beautifully, and they make such a fun little homemade gift or stocking filler.

They’re so much fun to colour with – especially if you colour in some of my Christmas bookmarks or Christmas colouring pages with them!
Using Them as Christmas Gifts
These little melted crayon cakes make such lovely, inexpensive Christmas gifts for children. You can pop a few into a small cellophane bag with a ribbon or add them to a craft-themed gift box alongside a colouring book or some festive printables.
They’re also brilliant for stocking fillers, party favours or even classroom treats if you want something a bit different from the usual sweets. Because you can make them in any shape or colour combination, they’re easy to personalise and feel much more thoughtful than anything you’d buy ready-made.
A Few Safety Tips for Little Helpers
If you’re making these with younger children, it’s best to put the crayon pieces into the moulds together and let them help choose the colours while you supervise.
The oven part should always be handled by an adult, as the moulds and melted wax get extremely hot.
Once they’re cooled and set, the crayons are completely safe to use — and little ones absolutely love seeing the shapes they helped create turn into real “new” crayons they can draw with.
A Christmassy Crayon that’s not just for Christmas
You can make these in so many different styles depending on the season or who you’re making them for.
• Try red, green and white crayons for a Christmassy swirl.
• Use heart-shaped moulds for Valentine’s crafts.
• Make rainbow versions using every colour you can find.
• Add a touch of glitter crayon for a sparkly finish.
• Mix in metallic colours for something a bit different.
They’re such a flexible little project and a great way to use up leftover craft supplies.
If you’re looking for a quick, cheap and genuinely fun festive activity, melted crayon cakes are perfect. They’re simple enough for little ones to help with, they look adorable when they’re finished, and they turn into something useful rather than ending up in a drawer. Whether you’re making them to gift, to add to Christmas Eve boxes or just for a cosy afternoon craft session, they’re a favourite for a reason — and they’re definitely a tradition I’ll be keeping up.
If you think you’ve seen this post before, you absolutely might have. This week’s posts are a little bit special because my very lovely daughter, Miss Frugal, has stepped in to help while I’m feeling a bit under the weather. She’s chosen some of her favourite old posts to share with you again – the ones that bring back happy memories of things we’ve made, done or visited together, and I honestly can’t wait to see what she’s picked. One of the conditions of her takeover was that she was allowed to do it all herself, so I’ve written this little intro for her to add to each post she chooses. I’ll be finding out what she’s re-sharing at the same time as you do. The control freak in me is very uncomfortable with this. 🫢
I’d love you follow me on Twitter and it would be amazing to see you over on my Facebook page and on Instagram. If you’re interested, you can find out more about me here and while I’ve got your attention, if you’re wondering why some of my posts lately are a little bit less frugal then have a read of this post. 😉